Showing posts with label Original Tutorial. Show all posts

April 5, 2011

DIY Photo Canvas!

I am always looking for fun and unique ways to display our family photos. These look professionally done, but for a fraction of the cost! I think I spent $10 for the whole project!
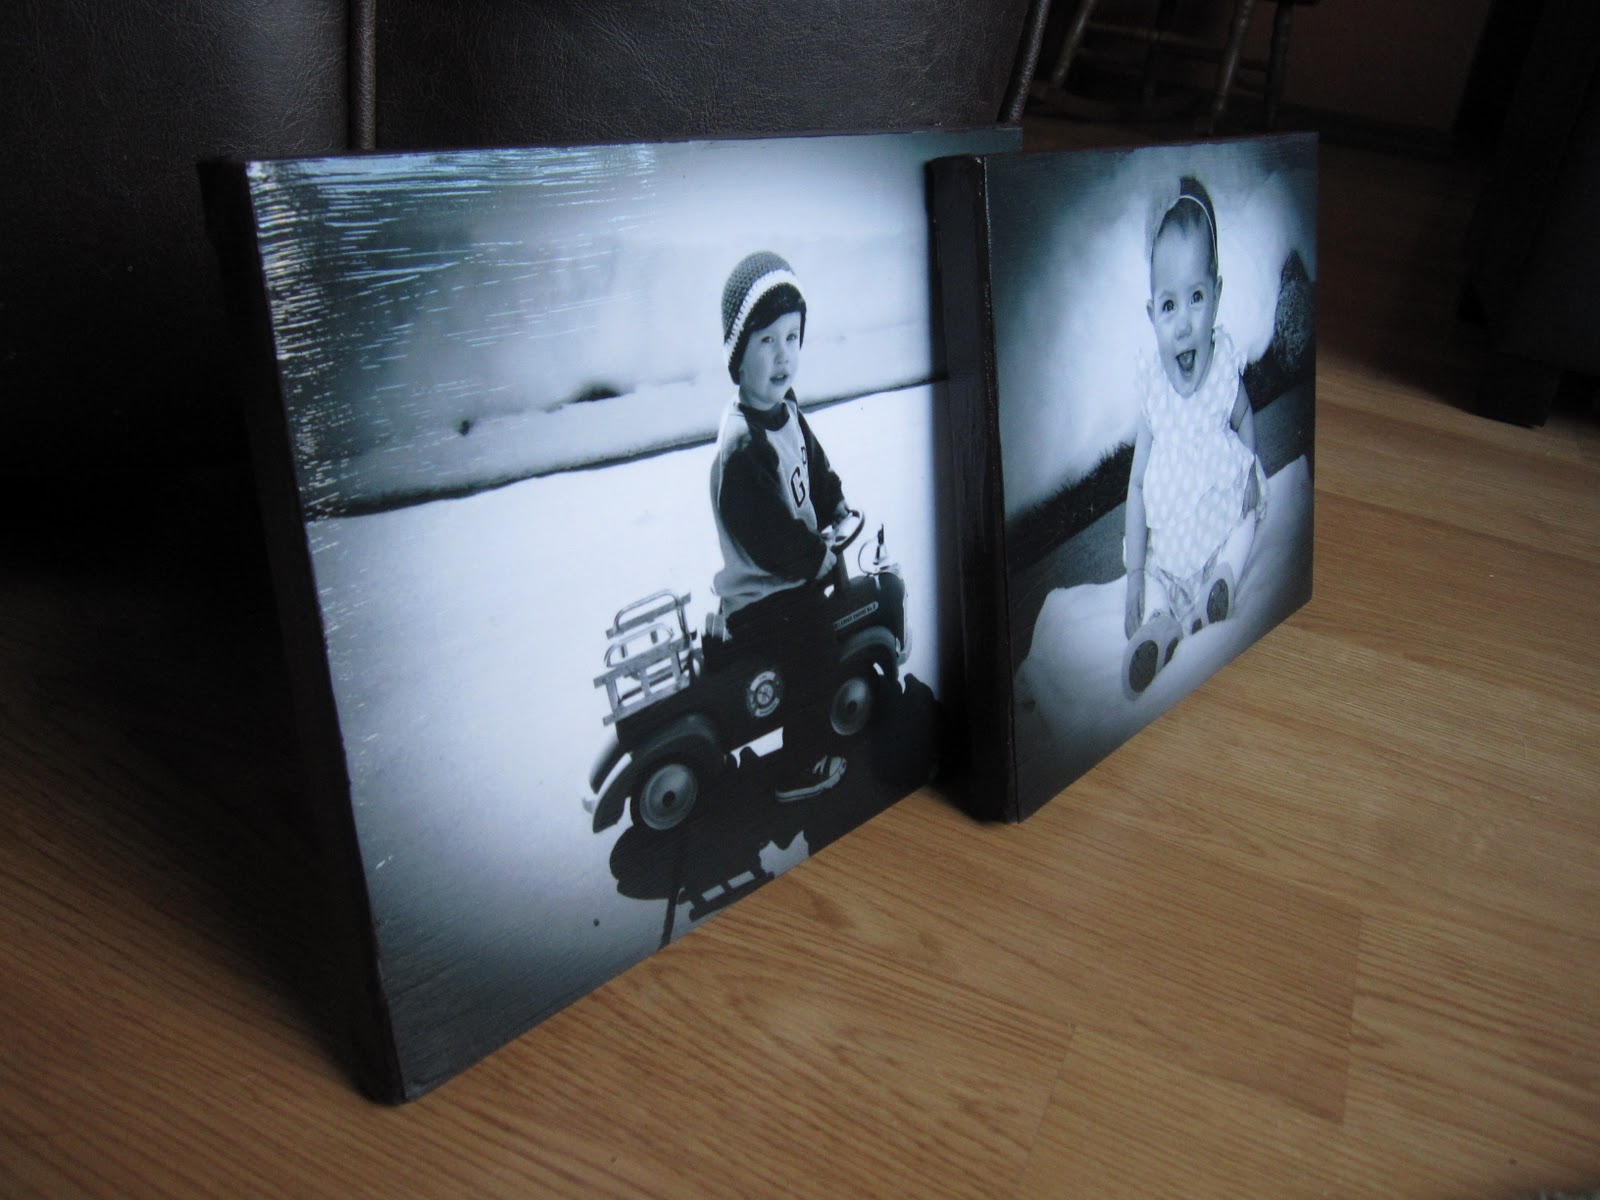


There were a few flops (learning experiences) along the way, 
but over all I'm very pleased with how these turned out!!!

Materials:
 Pre-Stretched Canvas (Any size, I choose 8x10)
Picture, same size as canvas
Mod Podge (I choose Glossy, but Matte would work)
Paint


1. Paint or decorate canvas edges. 
(Learning experience #1: I skipped this step thinking I wanted the edges white. I was wrong. Ended up painting them later, which was MUCH harder than if I had just done it first. Oh well, you live and you learn!)


(Obviously, your picture wont be on yet!)


2. Slap a whole lot of Mod Podge on your canvas. Place your picture on the canvas and align.


3. Coat picture with Mod Pogde. Be sure to only brush one direction (ie: side to side OR up and down)


4. Let dry and repeat. (I did about 3-4 layers)
(Hint: When Mod Podge dries, it shows the brush strokes. On the last layer make sure your strokes are even and clean, since this is how your picture will stay)


5. Hang and Admire your craftiness!


(I hung them in the hall, so the lighting isn't the best!)


My Flop:


I actually don't think it looks bad with white edges... just not as finished???
What do you think???


March 26, 2011

Old Crib Mobile Made New

What do you do with a crib mobile when your first child grows out of it?


Recover it for your second child!

I was never real crazy about the crib mobile that came with Jackson's crib set. But of course he was our first child so I had to buy the $150 6-piece bedding set. Anyways, we did get our use out of it with him and I got smarter when we were pregnant with my daughter. I made all her bedding, window treatments and changing pad covers by hand. Saved myself about $100! Following suit, I took the hardware from Jackson's mobile and created this new one for Jaelyn.

It was important to me that I changed the orientation of the dangling flowers. Have you ever noticed that most mobiles have their floating objects positioned so that only the adults can see what they are. From your baby's point of view, all she gets to see is the bottom portion of the hanging moon.

View my tutorial here, which I had published on my personal blog last summer.


March 22, 2011

"Italian" Ceramic Pot Holder

A couple weeks ago I discovered our local Habitat for Humanity Re-Store. If you don't have one in your area, picture Goodwill meets Home Depot.  LOVE!

I was there just to browse, so I didn't get as much as I could have, but I did pick up some Italian ceramic tiles. I fell in love with the shape, but could have gone without their color. I know to never judge anything by color (there is nothing spray paint or mod podge can't fix!), so I picked up 4.

I knew I wanted to change the color, but wasn't quite sure after that. I tucked them away for a rainy day project, until I knew what I was going to use them for. 

Well today it rained. Actually, it's raining, hailing and snowing. Definitally a project type of day!!! I decided on some Ceramic Pot Holders.

Here is what they looked like BEFORE:


And AFTER:


The Supplies:


The Hubs really liked the color of the Red ones (they actually have a cool marbly look to them, which was hard to catch on film) so I decided to pretty much leave those ones alone, and concentrate my efforts on the puke green colored ones.

I found some cute scrap booking paper that I liked and it went for it.

(Hint: No need to cut the paper to the exact shape. I used sand paper to "cut" the edges once dry. I think that gives it a more antique feel than a straight cut.)

1. I roughed up the tile with some fine grit sand paper and lathered on the Mod Podge.


2. Once I had a couple good layers of Mod Pogde on there I sanded the edges to get rid of excess paper.


3. I took some brown/black acrylic paint and painted the side edges. Using a paper towel I took a small amount of paint to blend in the sides and top to give it an "older" feel.


4. I sprayed the tiles with a Clear Heat Resistant Gloss to seal everything in.


5. Lastly I  glued some cork to the bottom of each tile. 


Super simple!

Can't wait to have my next dinner guest to show off my new Pot Holders!!!


***Where I got the "Italian" part of this project***


If they said, "Made in USA" would I have called them "American Ceramic Pot Holders"??? Probably not. But thinking that I have a little piece of Italy on my table helps me dream!

Hope you're having a great week!!!


March 14, 2011

Fabric Covered Accenting Balls

This is a simplistic project for anyone! Something your children could assist you with as long as you're careful with handling the placement pins. I found the engraved accenting balls at Hobby Lobby 50% off. Don't you just LOVE when Hobby Lobby has 50% off sales?? Each ball reads a scripture from the bible along with a value to live by. I chose Faith and Grace, although there were several more to chose from. I wanted to coordinate these balls with more color and display them on my kitchen table. I found this idea when I saw looking at a tear away "project ideas" sheet in the fabric dept. All you need are a few basic supplies that you may even have laying around the house.


Styrofoam balls - size & quantity is your choice. I chose 3" diameter
Colorful Fabrics - roughly a fat quarter amount
Flat head pins

1. Tearing the fabric
Here's a neat trick! Tearing the fabric (verses cutting) gives the edges more character. On your fat quarter of fabric and make a tiny slit about 2 inches from the edge. Take advantage of the length and make your strips down the longer sides. Grabbing both sides of the slit, begin to tear the fabric down from the slit. Make sure you are holding the fabric firmly and ripe it with force. Your fabric will tear nicely along the thread line. 


Discard the first strip that has the finished/cut edge. Begin to tear your 1.5 inch wide strips with your new torn edge. Keep in mind that the thinner the strips, the nicer they wrap around the styrofoam balls. However, tearing sections thinner than 1.5 inches in width, may cause your tearing to veer on an diagonal thus resulting in an uneven strip. Then remove all the stray threads. 

2. Wrapping the styrofoam balls
Pin the first end of the strip to the ball. Then simply wrap the fabric around the ball.

I found that folding part of the fabric under when you make a turn prevents the access fabric from bunching.


Continue to wrap the fabric all the way around until it's completely covered.

That's all there is to it!
Complete the rest of the balls and place together in a decorative bowl.


February 20, 2011

10 Minute Shoe Makeover

Who doesn't love a good clearance find?!?! I saw these pink flats and thought, 'these are too cute to be on clearance...what's wrong with them?' I couldn't find anything, they were perfect, except... for the size!

Photobucket


However, a good friends birthday was coming up and I needed the perfect accessory to pull the whole gift together... and they had her size. Score!

The theme to her gift was Black&White with a hint of pink. Therefore these already cute flats needed some B&W love...

Photobucket

What do you think? Better before? Or are you loving the B&W?!?!

How to make-over your shoes? Heres what I did...

Take a 6 inch by 36 inch piece of fabric and iron the edges inward.

Photobucket

Then iron the fabric in half.

Photobucket


Roll one end of the fabric and keep twisting the fabric around itself,
until you form a rosette to the size you need.

Photobucket


Photobucket

(I used hot glue along the way, to make sure they were nice and secure)

Next, I cut off the old pink rosettes and hot glued the new B&W rosettes on.

Photobucket

Voila! Super cute, one of a kind flats!
(And all under 10 minutes... can't beat that!)

Photobucket

I can not wait to show you the maternity shirts I have been working on to match these fun accessories! Check back soon to see all the fun we have here at TB2C!!!

Photobucket


Linked up at:


Make it Yours @ My Backyard Eden


LINKPARTYBUTTON

February 10, 2011

Simple Chiffon Scarf


How many times do you get completely sidetracked at the craft store? You're there for a few specific items and before you know it, your head is in the clouds. "Ooo, that will look great with (fill in the blank) _________ that I bought here yesterday last week." My project to-do list is already a mile long, not to mention the three unfinished projects that currently reside on my kitchen table. 

Raise your hand if this is you!    


It's funny how sometimes the craft ideas that come to your mind during those sidetrack moments, can turn out to be the most fun.

 So here it is...

SideTrack Project #1
Simple Chiffon Scarf


I found these items at Joann's (where else?). The black chiffon fabric roughly 3 inches wide bond together with a ribbon along one side and the other is an elastic piece of grey sequence and gathered meshing. I bought 2 yrds of each. What I liked about finding these pieces, is they are already finished along the sides.


First, take the chiffon piece and open it so that the binding ribbon is down the center. Hold the fabric in place with pins down the entire length. It will be pleated to some extent.


Make sure that your machine is set appropriately for light weight, delicate fabrics. Using a straight stitch, sew down the center with like colored thread.  


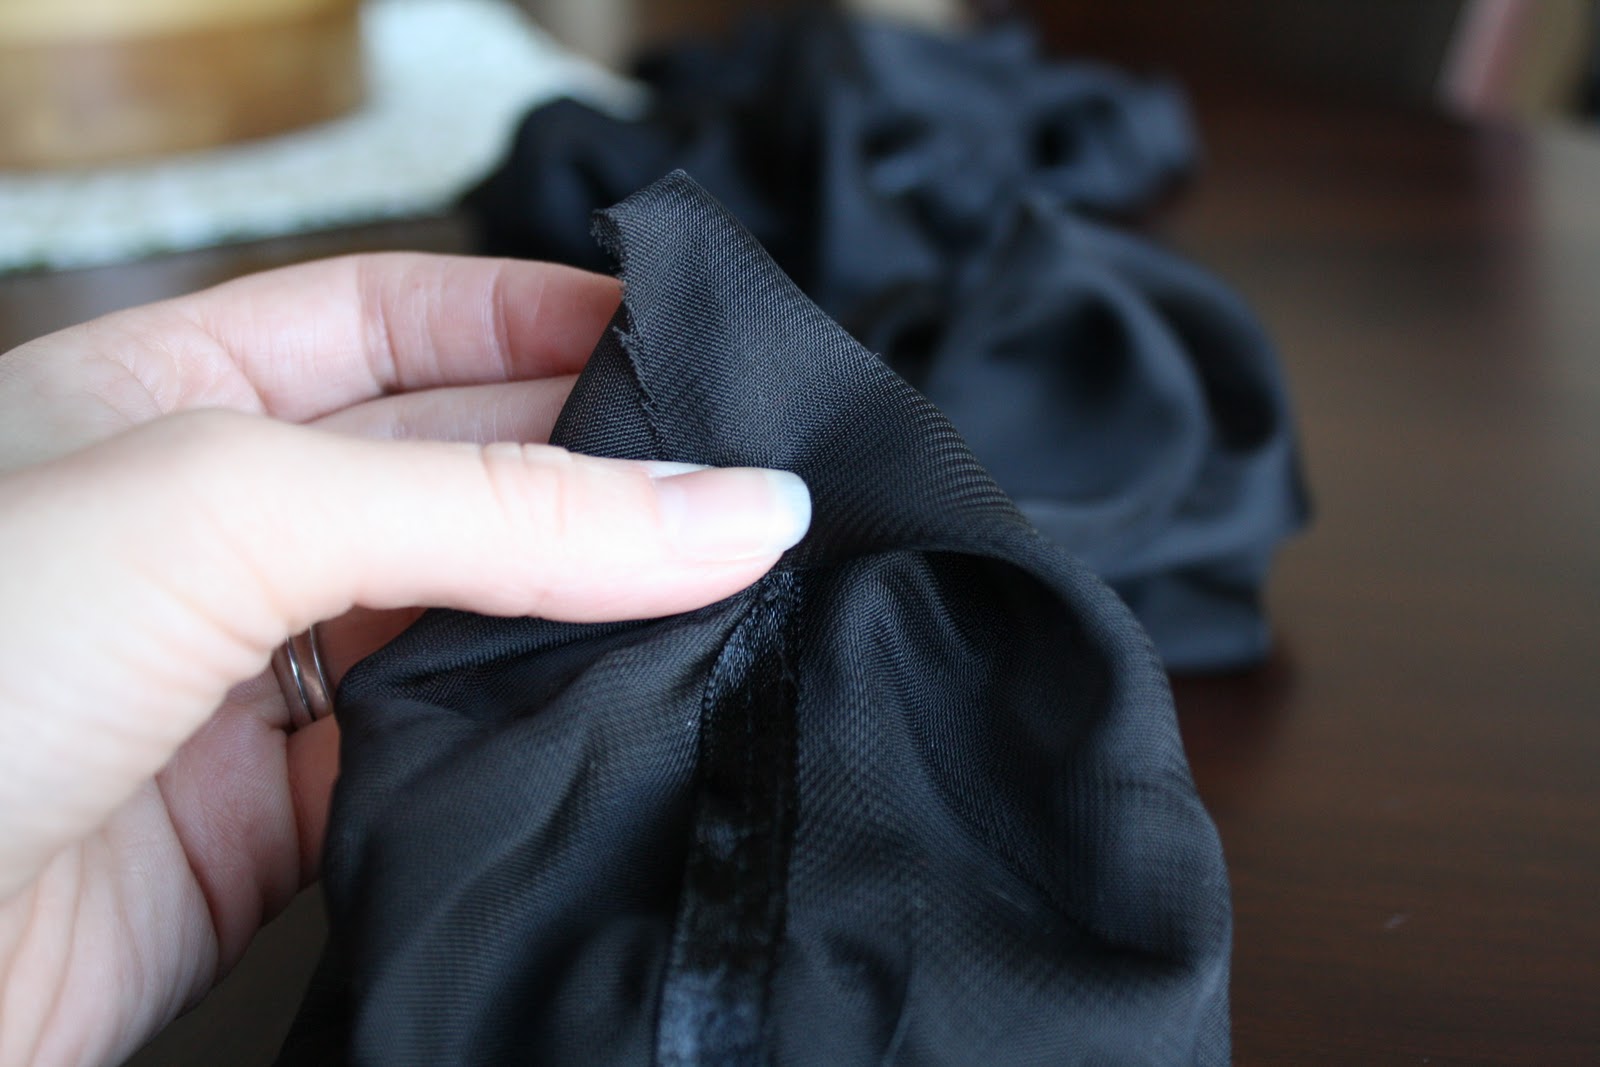
This is how your fabric will look once you have sewn down the center. One side will have the ribbon down the middle and the other side won't - I will call the nonribbon side "blank side". We will be attaching the sequence elastic strip on the blank side.

 First, take one raw end of the chiffon fabric with the binding ribbon facing you.


Fold the corners down to the middle to form a point.

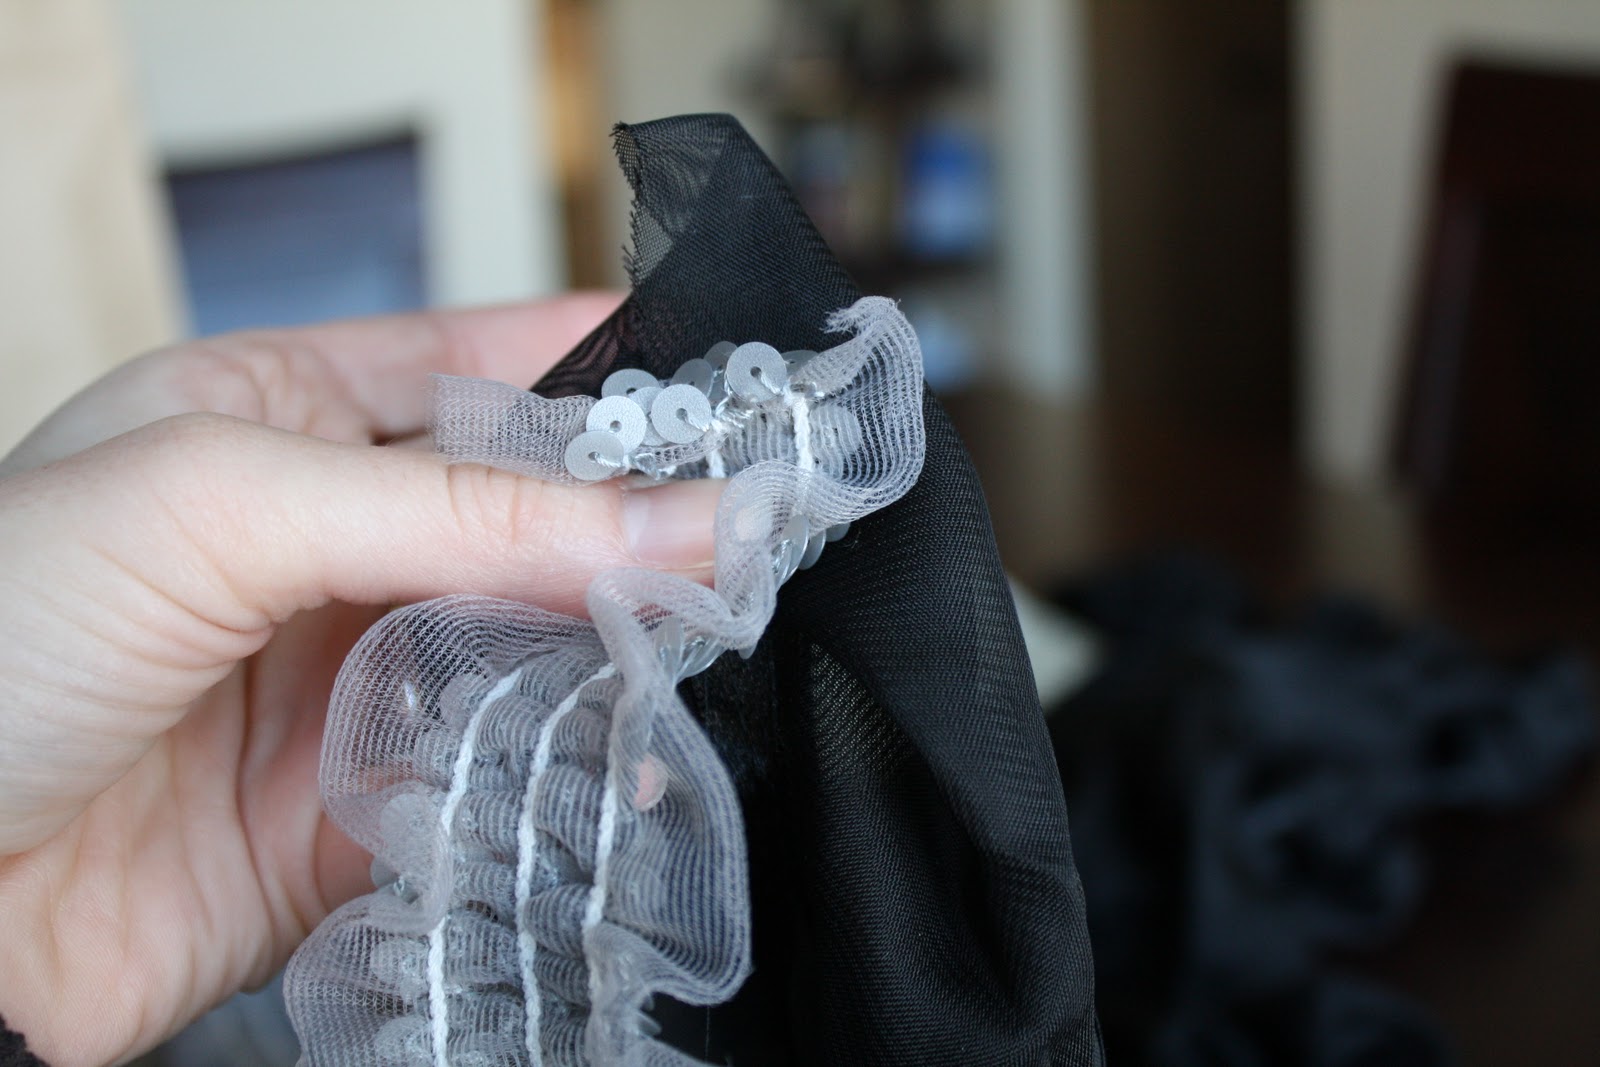
Position the elastic piece face down right over the folded point and pin in place.

Because the binding ribbon side is facing you, the rest of the chiffon fabric should be laid out on the table with the blank side facing upward. Lift up the elastic piece so the you see the right side and fold it back along the chiffon ribbon.


This will give the end a finished look


 Begin to sew the two pieces together. If you want a full gathered look to your scarf, make sure you are pulling the elastic piece as you feed the machine. <-- option I chose.  If you prefer only a light pleating, then sew the elastic piece without stretching it. Continue sewing the full length of the scarf. 


Once you have reached the other end, finish it off the same way you started. Folding the raw corners in to form the point.

This time you will need to fold up the corner to expose the binding ribbon from underneath.

Then fold the raw end of the elastic piece under...


Finish sewing through to the end and along the botton width to secure the end. Then sew alongside the sequence on the other side to complete the attachment.


That's It!


Linked up at:


LINKPARTYBUTTON