
How many times do you get completely sidetracked at the craft store? You're there for a few specific items and before you know it, your head is in the clouds. "Ooo, that will look great with (fill in the blank) _________ that I bought here yesterday last week." My project to-do list is already a mile long, not to mention the three unfinished projects that currently reside on my kitchen table.
Raise your hand if this is you!

It's funny how sometimes the craft ideas that come to your mind during those sidetrack moments, can turn out to be the most fun.
So here it is...
SideTrack Project #1
Simple Chiffon Scarf

I found these items at Joann's (where else?). The black chiffon fabric roughly 3 inches wide bond together with a ribbon along one side and the other is an elastic piece of grey sequence and gathered meshing. I bought 2 yrds of each. What I liked about finding these pieces, is they are already finished along the sides.

First, take the chiffon piece and open it so that the binding ribbon is down the center. Hold the fabric in place with pins down the entire length. It will be pleated to some extent.

Make sure that your machine is set appropriately for light weight, delicate fabrics. Using a straight stitch, sew down the center with like colored thread.

This is how your fabric will look once you have sewn down the center. One side will have the ribbon down the middle and the other side won't - I will call the nonribbon side "blank side". We will be attaching the sequence elastic strip on the blank side.

First, take one raw end of the chiffon fabric with the binding ribbon facing you.

Fold the corners down to the middle to form a point.
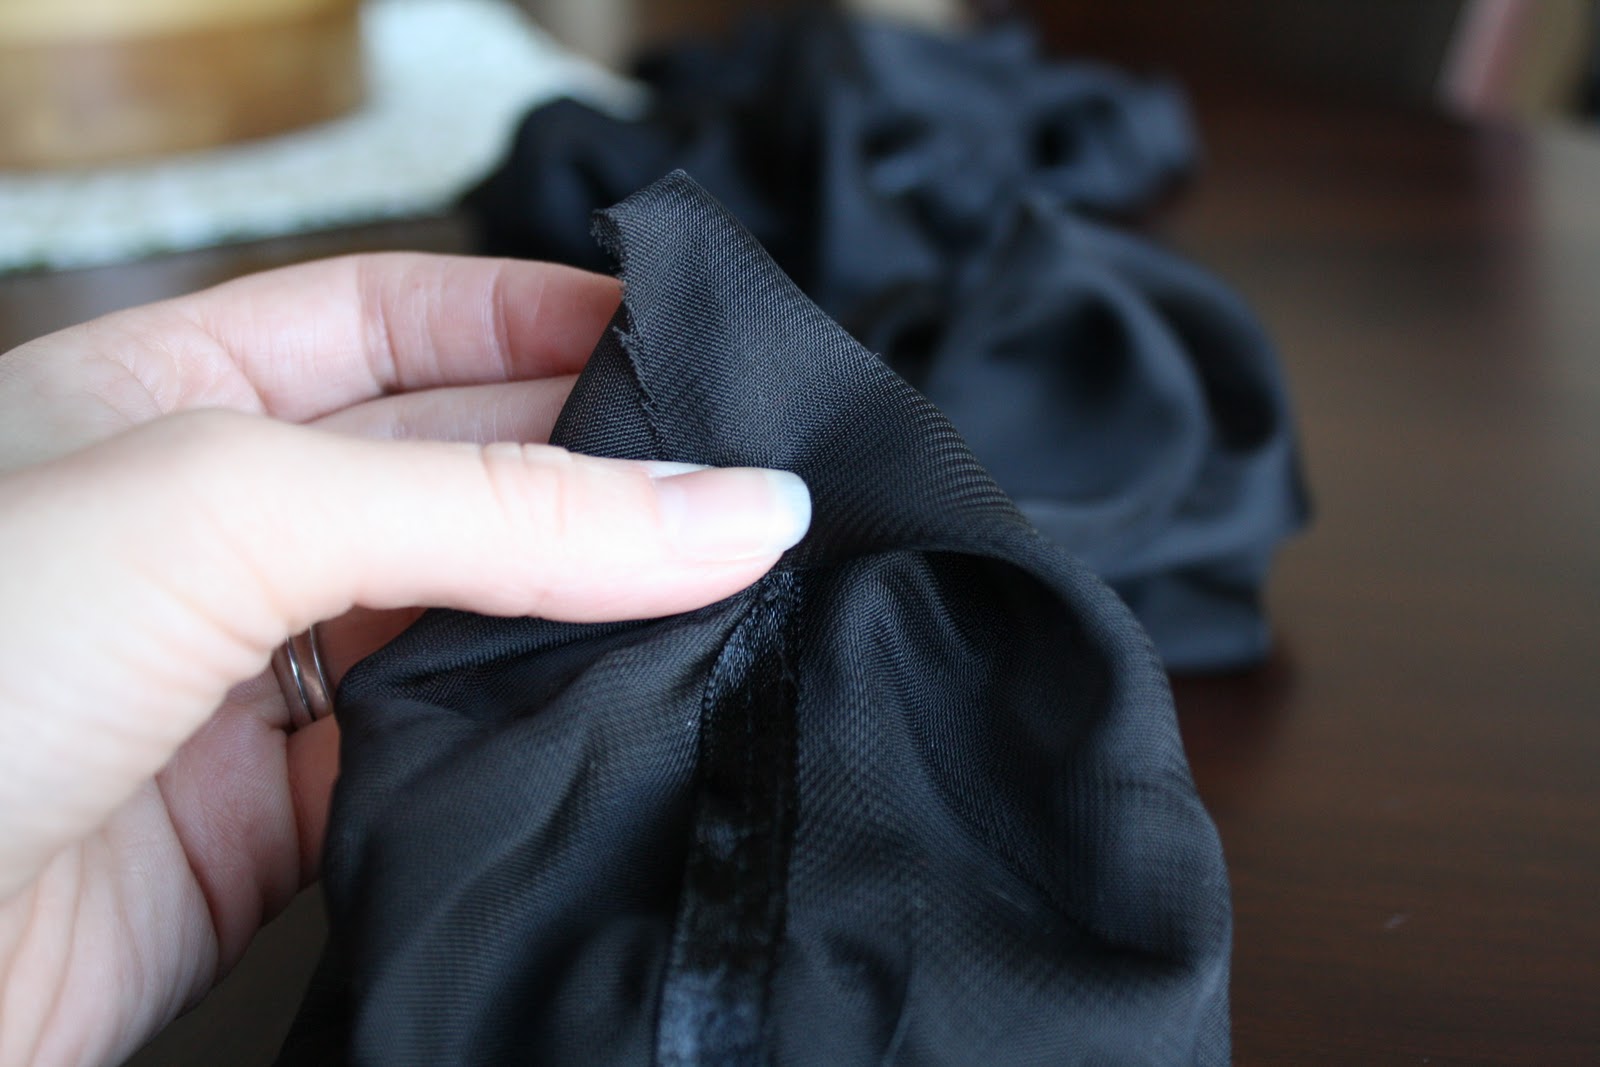
Position the elastic piece face down right over the folded point and pin in place.
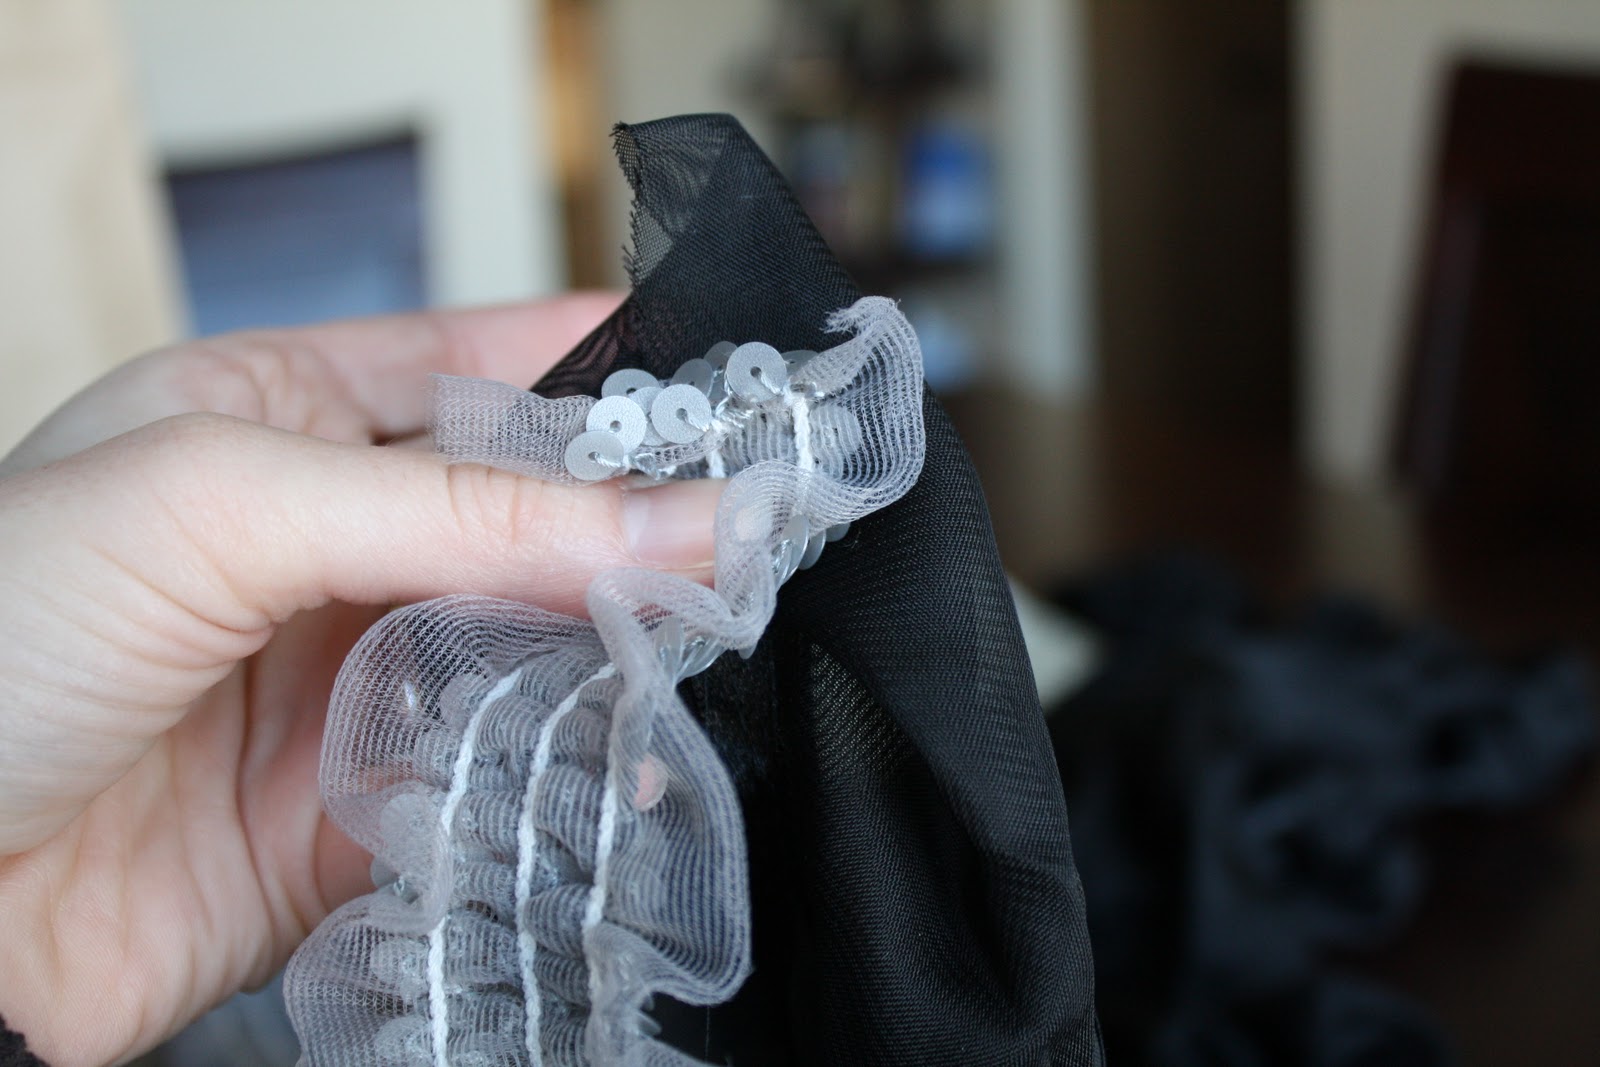
Because the binding ribbon side is facing you, the rest of the chiffon fabric should be laid out on the table with the blank side facing upward. Lift up the elastic piece so the you see the right side and fold it back along the chiffon ribbon.

This will give the end a finished look

Begin to sew the two pieces together. If you want a full gathered look to your scarf, make sure you are pulling the elastic piece as you feed the machine. <-- option I chose. If you prefer only a light pleating, then sew the elastic piece without stretching it. Continue sewing the full length of the scarf.

Once you have reached the other end, finish it off the same way you started. Folding the raw corners in to form the point.

This time you will need to fold up the corner to expose the binding ribbon from underneath.

Then fold the raw end of the elastic piece under...

Finish sewing through to the end and along the botton width to secure the end. Then sew alongside the sequence on the other side to complete the attachment.

That's It!


Linked up at:

2 comments:
Thanks for the sweet things you said about my coat rack. I love the scarf and I have eaten a few dinners on a table that looks very similar to yours. So glad I'm not the only one!
(jacshembree.blogspot.com)
Love this scarf- those sequins make it so glamorous! Thanks for linking up!
Post a Comment